The platform is under active development. Interface details may change between documentation updates.
01
Start
Create an account
Welcome to the Acute Immersive Platform! Acute makes immersive video post-production and distribution a breeze. Think of it as a content management system (CMS) like WordPress, for immersive video. You can upload video files of many different formats, privately play them via streaming with our companion Apple Vision Pro app, collaboratively review them with your team inside the headset, and dynamically publish them in your white-label Vision Pro app, with no code change needed. But first, you need an account.
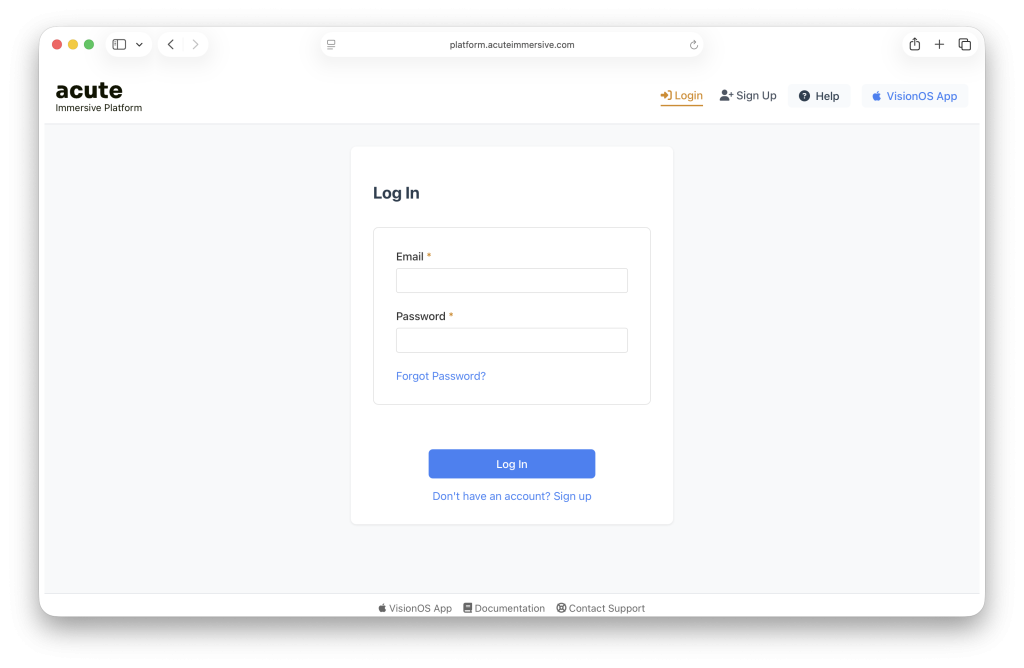
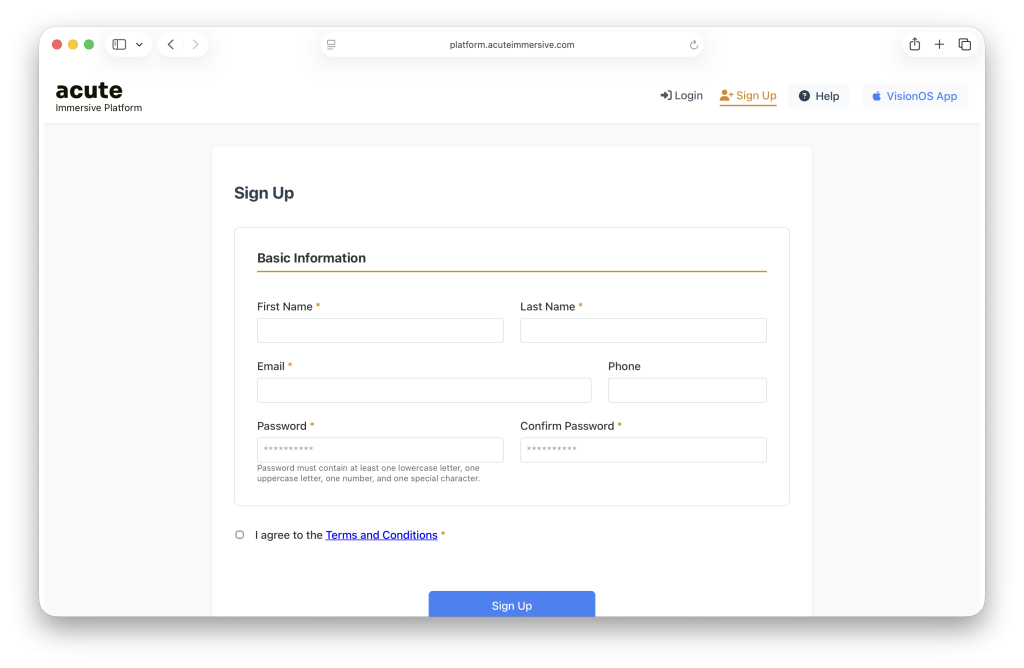
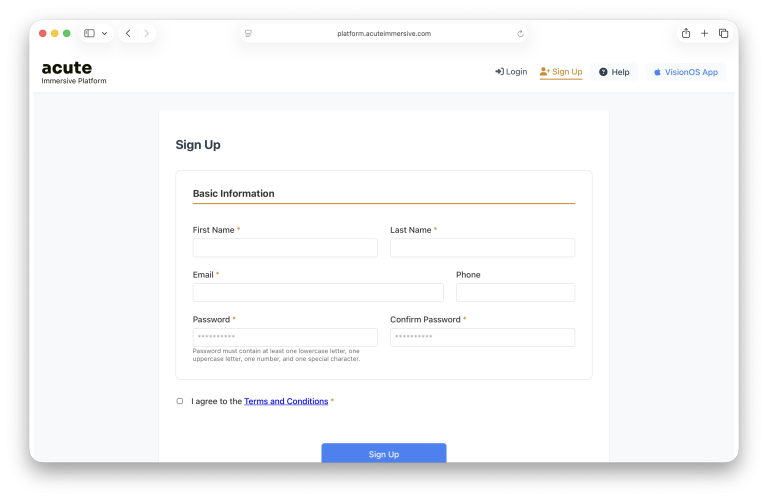
Navigate to Sign Up and fill in the registration information. Mandatory fields are marked with an asterisk. Once you’re done, click the Sign Up button at the bottom.
Step 02 · Acute interface
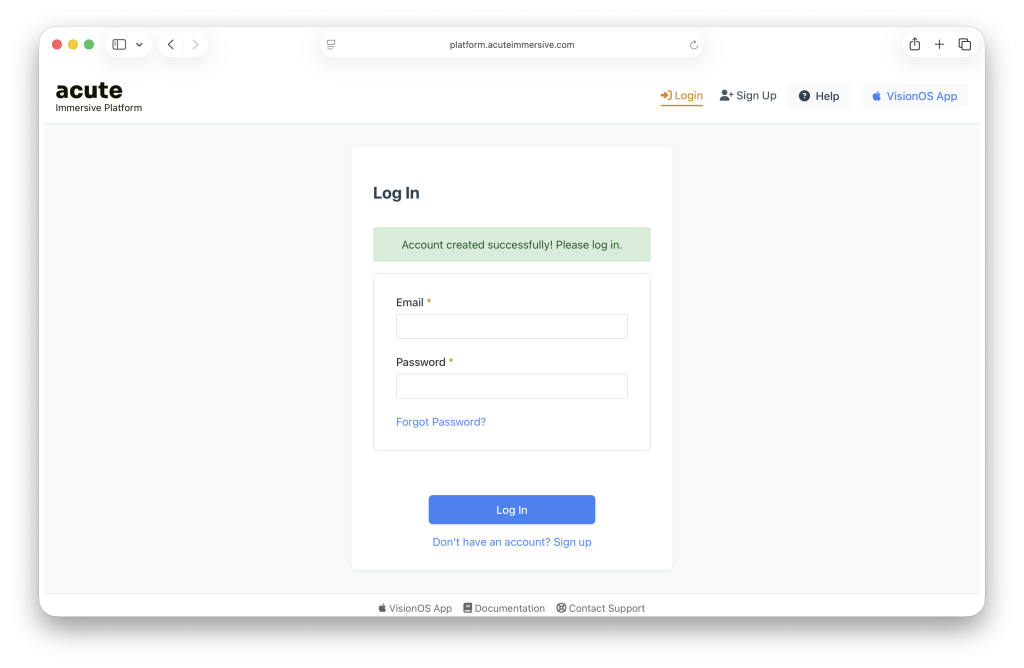
Once back at the Log In page, use your email and password to log in.
Step 03 · Acute interface
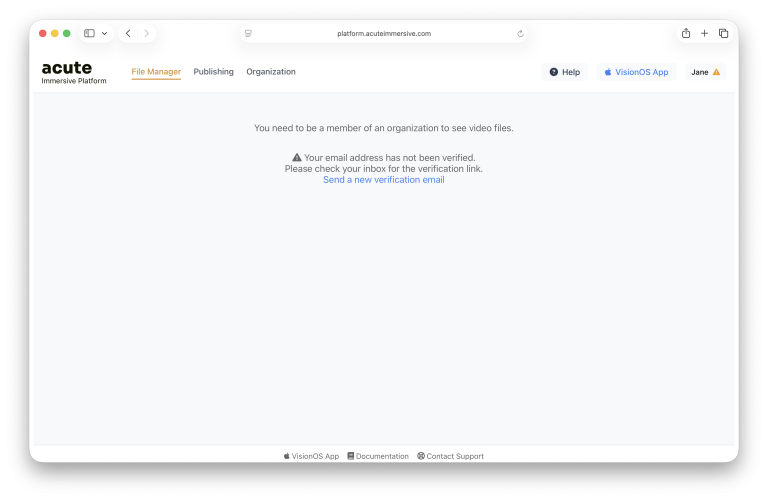
You should receive a welcome email at the address you provided, containing a Verify Email link. You’ll need to click this link before you can use the platform. The link expires after 24 hours. You can send a new verification email at any time.
Step 04 · Acute interface
02
Start
Create an organization
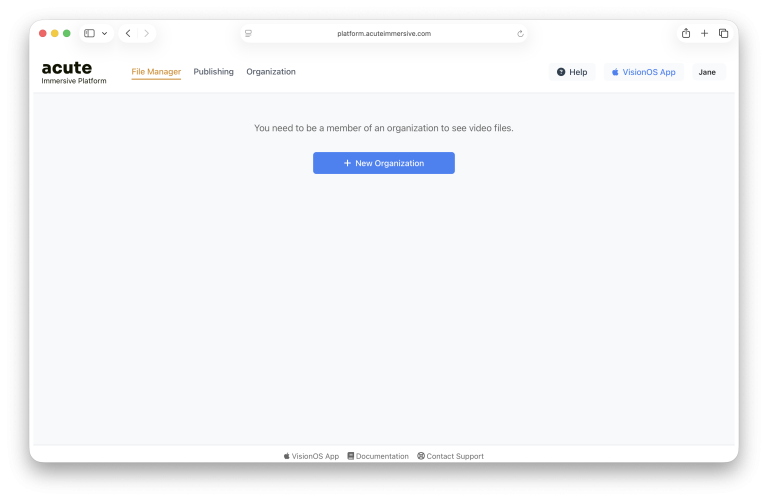
Once logged in with a verified email, you are taken to the File Manager. In the Acute Immersive Platform, you need to be part of an Organization in order to upload videos. Any content belongs to an organization, and what you can see and do depends on your user account’s role within this organization.
If you are a solo individual, just create an organization in your own name. If you are joining an existing team, ask the team’s Owner to invite you as a collaborator.
If you are creating a new team, click the New Organization button.
Step 01 · Acute interface
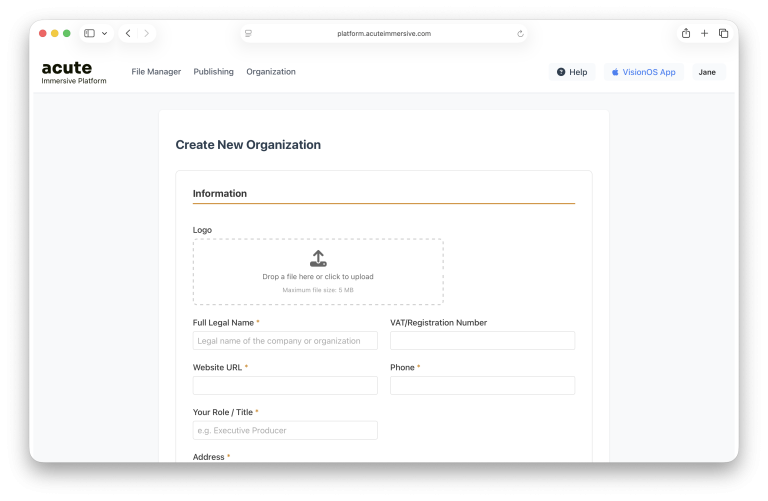
Fill in the required information for your organization. Mandatory fields are marked with an asterisk. Once you’re done, click Create Organization.
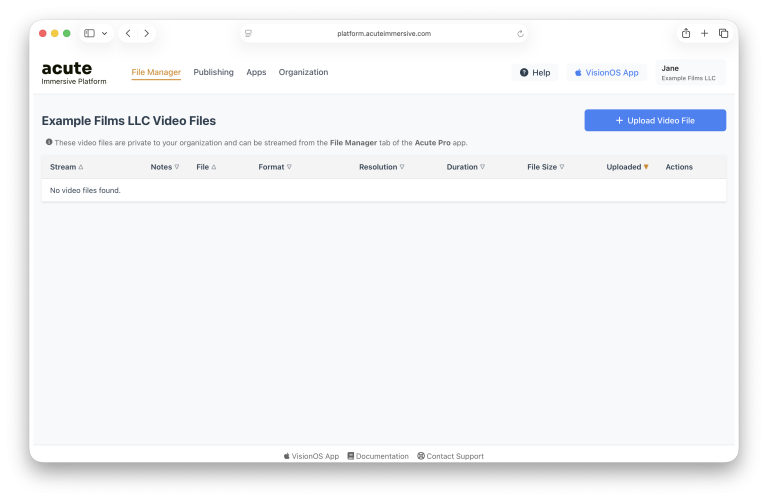
This new organization is now owned by your user account. You’ll notice the name of the organization appears under your first name in the User Menu button at the top right.
Step 02 · Acute interface
03
Media
Upload a video
The default page is the File Manager, which lets you manage your organization’s video files. You can think of it as a Dropbox or Google Drive folder. New videos are created private, so only you (and members of your organization) can see them in the Acute Immersive Platform and in the Acute Pro app for Apple Vision Pro. Everything in the Acute Immersive Platform is private by default. Other than you, your collaborators, and Acute employees, nobody can see your organization, your users, or your video files. Publishing videos involves explicit steps, detailed further below.
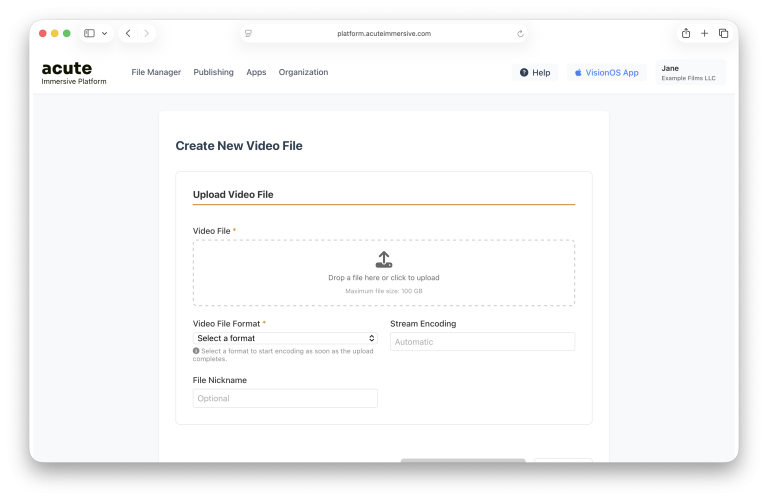
Click the Upload Video File button. We don’t impose strict format requirements for video files, but we have recommended export settings on a page we update frequently. The file size limit is 100 GB at the moment, which should cover most exports in h.265 and MV-HEVC. In any case, do not upload RAW and avoid intermediate formats like ProRes (we still support it).
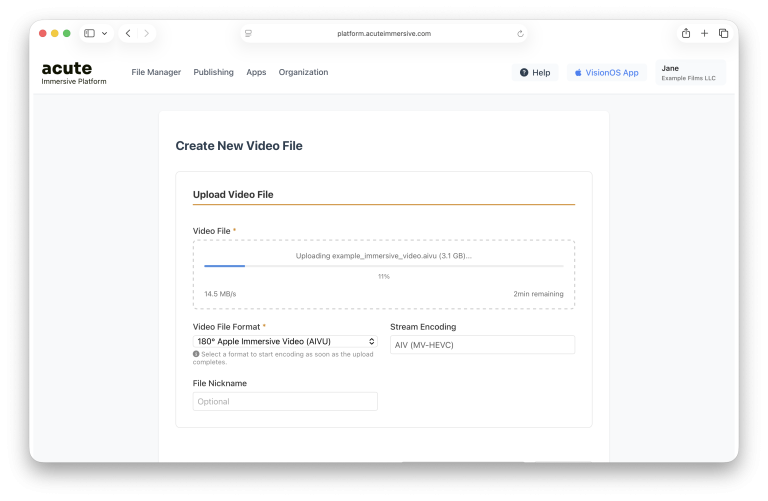
Drag and drop your video file into the Video File box and let it upload. It will take a while.
Step 01 · Acute interface
Select the Format from the dropdown list that corresponds the best to the video you uploaded. This is important to ensure the streaming encoding succeeds. Tip: you can select the format before the upload completes so that encoding starts straight away; otherwise select a format and click the Save & Encode button. At the moment, the Acute Immersive Platform supports the following formats: Apple Immersive Video (.aivu); Spatial Video (MV-HEVC, rectilinear) taken from iPhone or Apple Vision Pro; Stereo VR180 (1:1 MV-HEVC, half-equirectangular); Stereo VR180 (2:1 side-by-side, half-equirectangular); Mono VR180 (1:1 half-equirectangular); Stereo VR360 (2:1 MV-HEVC, equirectangular); Stereo VR360 (1:1 over-under, equirectangular); Mono VR360 (2:1, equirectangular); Other (Mono, rectilinear). We support up to 16K on ingestion, although the effective streaming pixel size will be capped at 12K due to Apple Vision Pro playback limitations, subject to change. Similarly, we currently cap the streaming bitrate at 100 Mbps after accounting for compression gains to HEVC/MV-HEVC, depending on the source format.
Step 02 · Acute interface
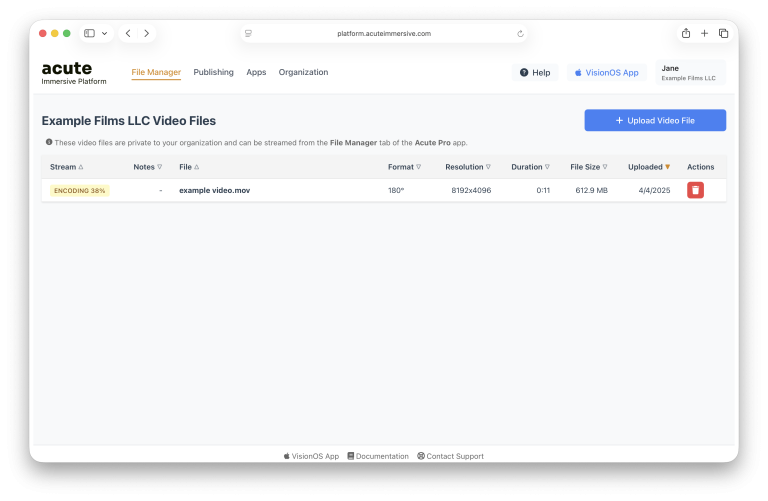
Back in the File Manager, you’ll see that the video is now queued or encoding. It will take a few minutes, or a few hours, depending on the file size and system load. As a rule of thumb, expect up to 1 hour for each minute of video.
Step 03 · Acute interface
The File Manager is designed to handle many files, whether they are rushes, dailies, or final cuts. Projects and folders will come at a later time. In the meantime, a good idea to preserve sanity is to use nicknames for files, which you can change at any time by clicking the file name in the list.
Step 04 · Acute interface
04
Media
Preview a video
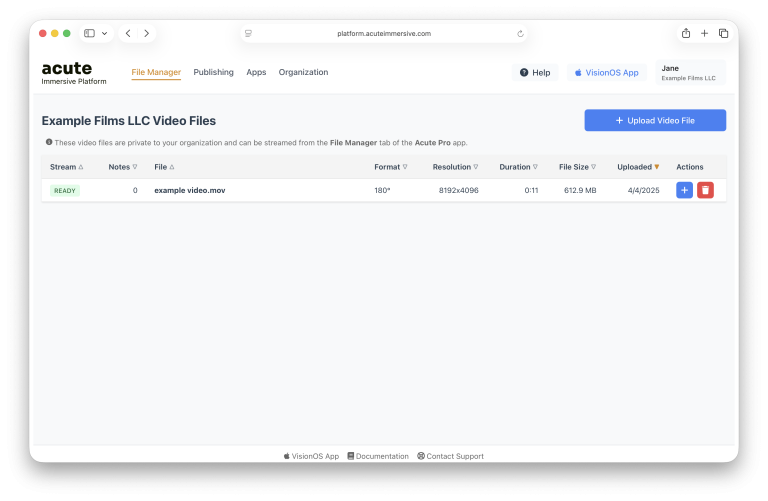
Once the video is encoded successfully, it will be marked as Live. It means that it is available for streaming, but it’s still private to you and your collaborators.
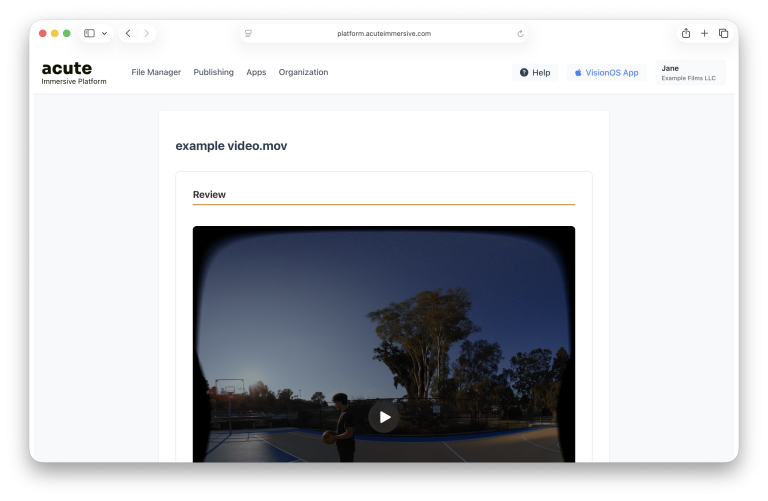
Click the video file row to open its details page.
Step 01 · Acute interface
You can now play and preview your video in the browser. In the case of stereo video, it is normal and expected that the playback includes only one eye.
Step 02 · Acute interface
05
Review
Download the Acute Pro app
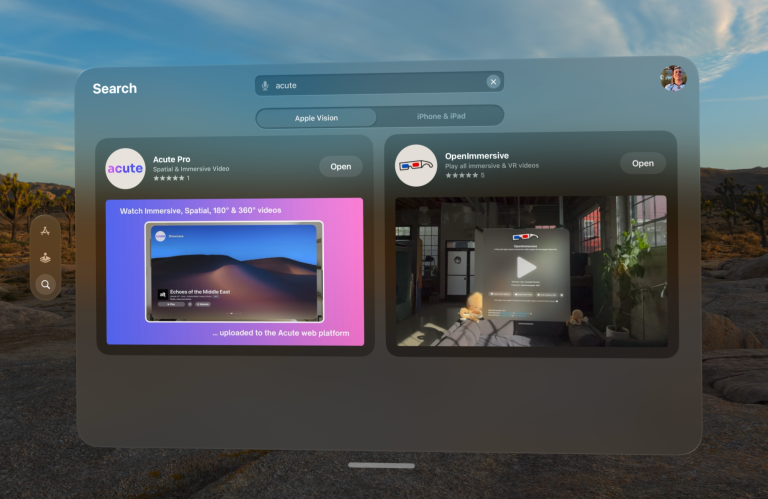
Download Acute Pro from the App Store app on your Apple Vision Pro.
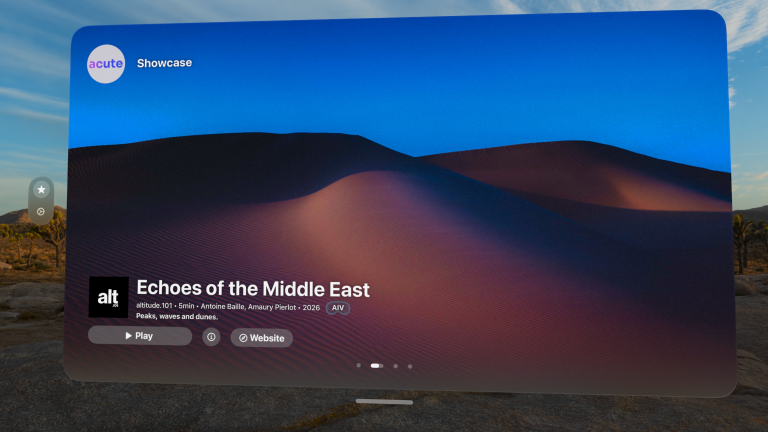
As of writing, navigation in the Acute Pro app is changing rapidly — navigation, UX, and features will be improved through the remainder of 2026. Acute Pro opens in the Showcase tab, where users of the platform can present their work.
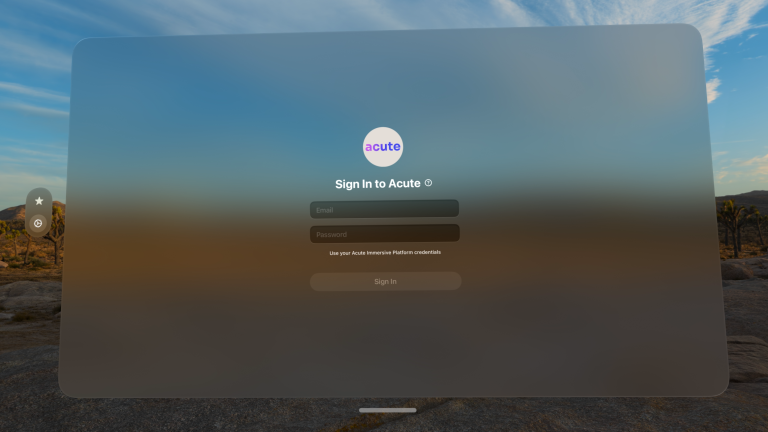
Go to the Settings tab on the left (gear icon). Sign in with your Acute Immersive Platform credentials. Tip: typing a password with the Vision Pro keyboard is very cumbersome — use the Passwords button on the keyboard to store & load your credentials.
Step 01 · Acute interface
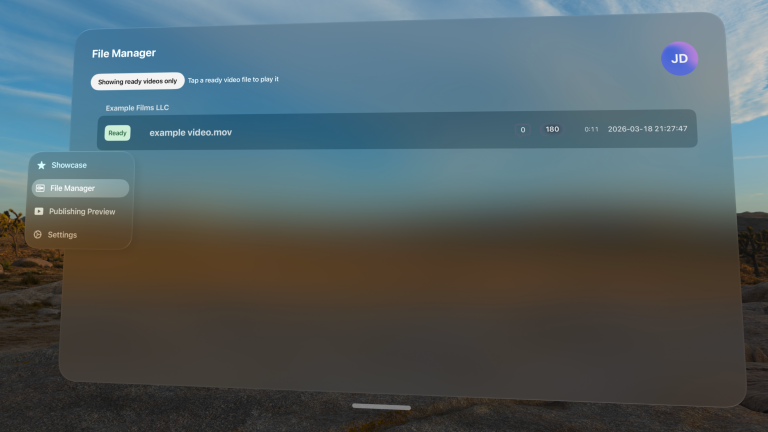
After logging in, the app will open the File Manager tab. Videos that belong to your organization will appear listed there. If you don’t see your videos, try toggling “Showing live videos only” to reveal videos that are not playable.
Step 02 · Acute interface
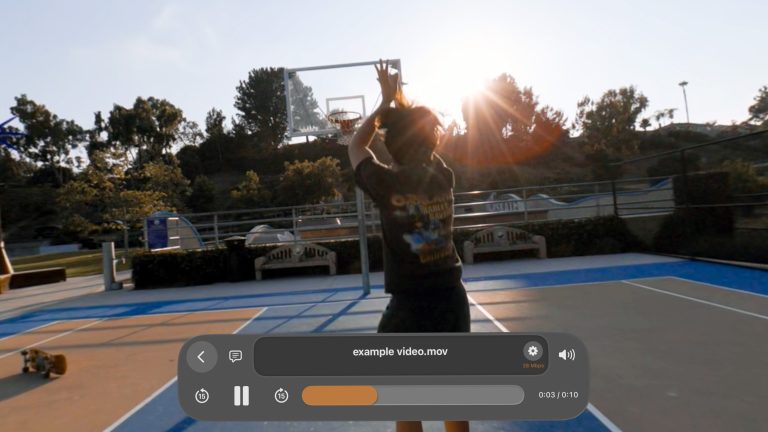
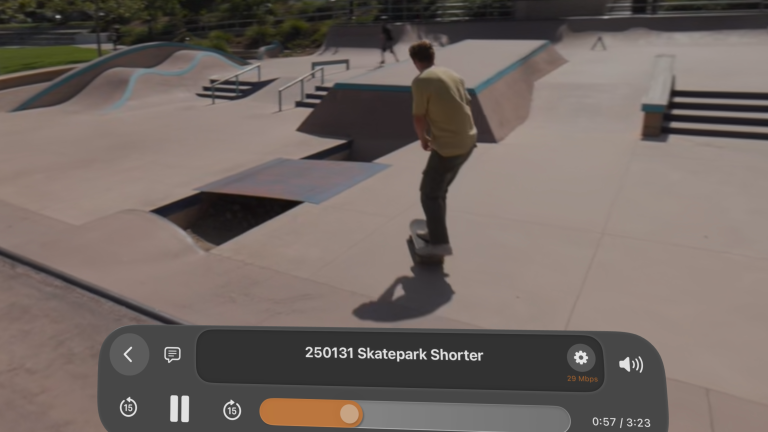
If the video’s Stream Status is Live, tap it on the list to play it. As the video plays, you have access to the same playback controls as OpenImmersive.
Step 03 · Acute interface
Tip: for AIV and Spatial video, you can play your video files using the native visionOS player instead. The option is available in the Settings tab.
Step 04 · Acute interface
07
Review
Invite collaborators
The Acute Immersive Platform has a powerful role and permission system to help you collaborate with your team on the post-production and distribution of immersive video.
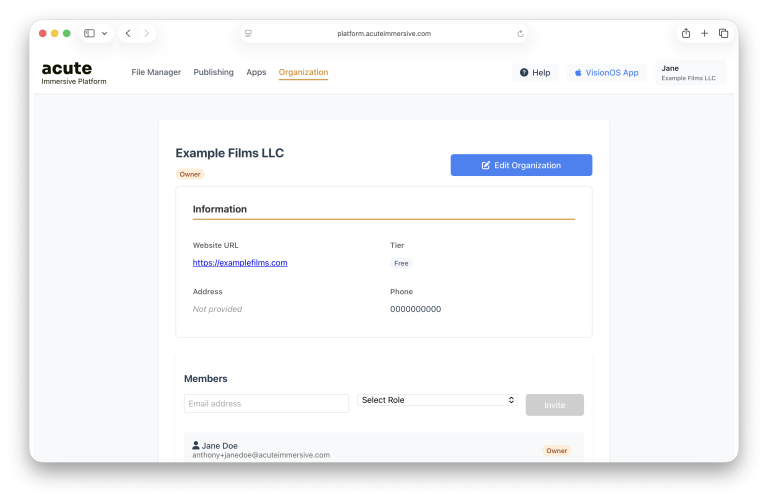
Back in the immersive platform page, go to the Organization tab, from which you manage your organization. All video files are created private, so only members of your organization can see them in the Acute Pro app for Apple Vision Pro.
Step 01 · Acute interface
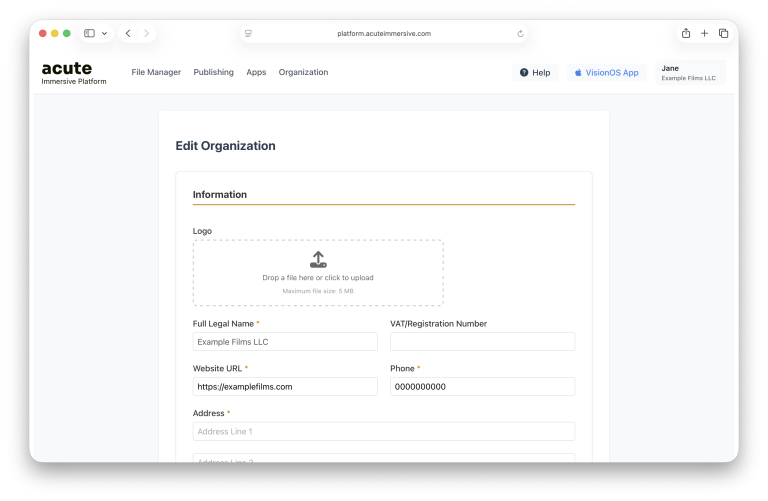
Click the Edit Organization button. Here, you can modify information about your organization, if necessary — for example, drag and drop a logo image file that will appear in the dashboard. Changes are only taken into account if you click the Save Changes button at the bottom of the form.
Step 02 · Acute interface
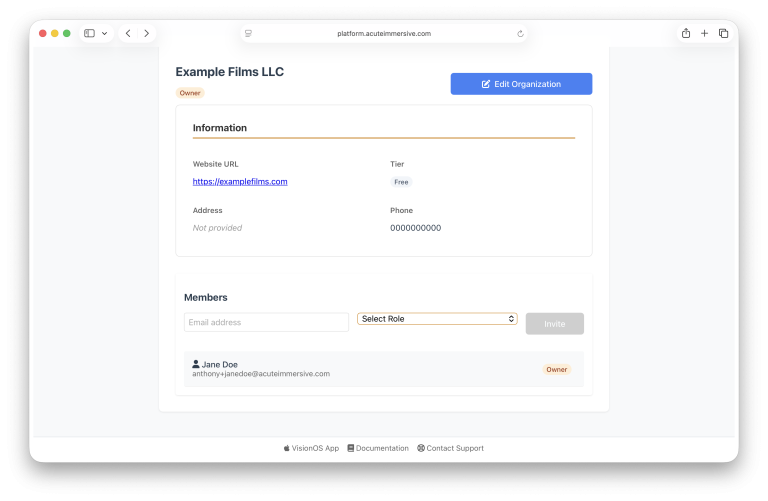
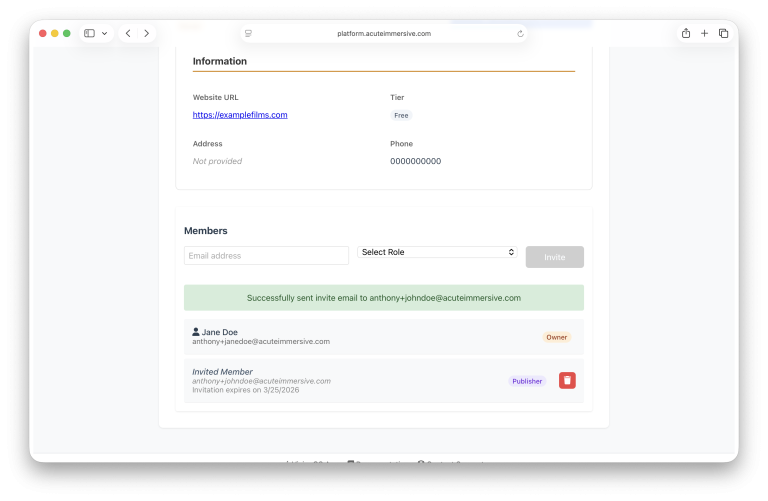
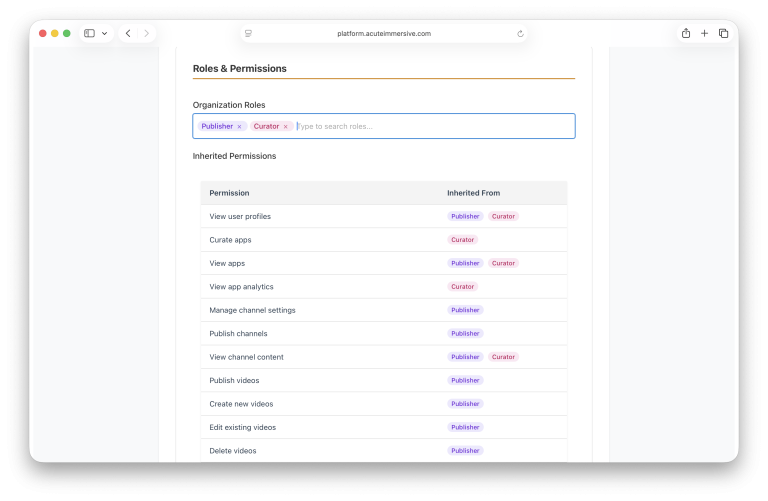
Back on the Organization page, scroll down all the way to the bottom — you’ll see the organization’s member list, listing only you as the Owner. Members can have one or multiple roles, which correspond to different levels of permissions: Owner (can do everything in the organization; the role cannot be granted or revoked), Admin (can do everything except remove the Owner), Publisher (can edit and publish content, but not manage users), Editor (can create and edit content but not manage users or publish videos), Curator (can curate app content, but not create or edit videos), Reviewer (can review and add notes to private videos, but not create or edit them), Viewer (can view all content but not create or edit anything), and Guest (can only view private videos). The difference between Viewer and Guest is subtle at the moment: Viewers have access to organization information including the member list, while Guests don’t. Guest is the ideal role for customers and other users who need access to private content while not being part of the team.
Step 03 · Acute interface
Enter the email, select the appropriate role and click Invite. You can rescind invitations using the trash can icon to the right.
Step 04 · Acute interface
Invited members receive an email with a personal signup link that lets them register and automatically join your organization. Once they register, they will appear with their first and last names instead of “Invited Member.” Click one of them to see or update their roles and corresponding permissions in detail.
In the Acute Pro app, play a video from the File Manager.
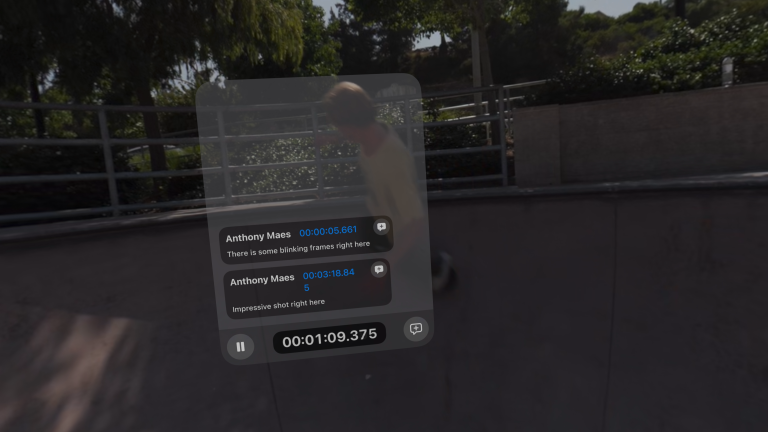
To the right of the back button, tap the Review Panel toggle button (speech bubble). A semi-transparent Review Panel will appear to the left of the Control Panel.
Step 01 · Acute interface
The Review Panel lists existing timecoded notes added to this video file, if any. At the bottom, there is a precise timecode readout, a Play/Pause button, and a New Note button (speech bubble with + sign). This button is only available if your organization role is Reviewer or above.
Step 02 · Acute interface
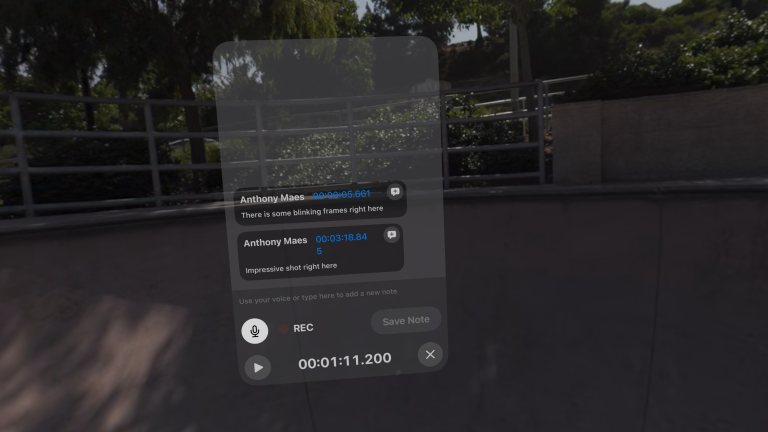
Click the New Note button to add a new note, or tap the timecode on an existing note to add a reply to its thread. By default, speech transcription starts when starting a new note or reply — a flashing “REC” indicator shows when it’s active. Turn it on or off with the Speech button (microphone), or type/correct the note with the keyboard.
Step 03 · Acute interface
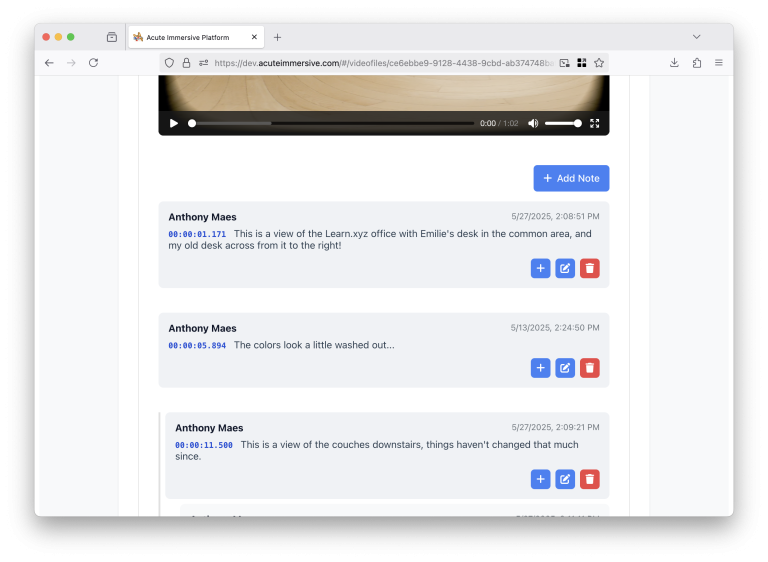
When you’re done, select Save Note or Save Reply. You’ll find the notes under the video player in the Details Page (eye button) of the video file.
Step 04 · Acute interface
09
Publish
Prepare a video for publishing
The Acute Immersive Platform offers two ways to publish videos outside your organization: publish the video in an app (your own white-label app or Acute Pro’s Showcase tab), or share the video with a private Share Link. In either case, you need to prepare the video for publication by associating the video file with metadata: title, description, poster, and more.
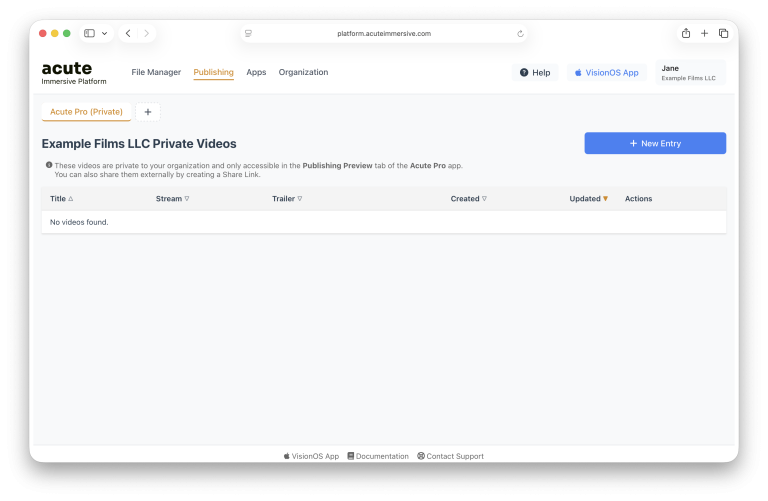
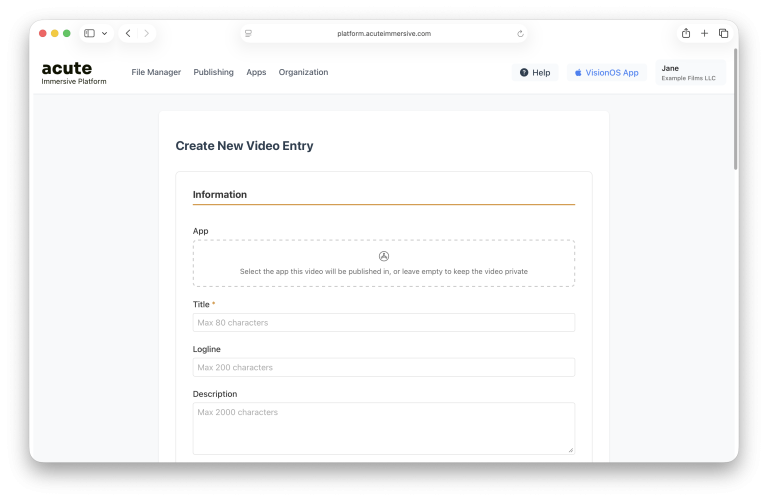
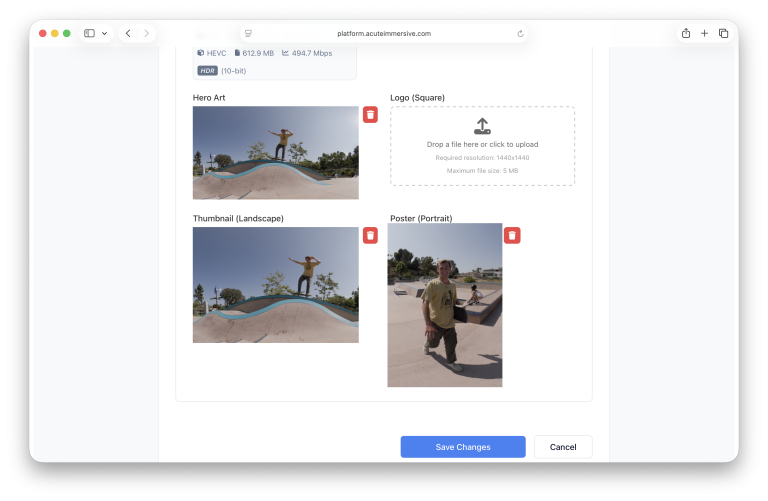
In Publishing, click the New Entry button. The form has a lot of fields (information, production properties, image and video assets), but you can create a video just by entering a Title — you don’t have to fill everything immediately. You can leave the App field empty for now.
Step 01 · Acute interface
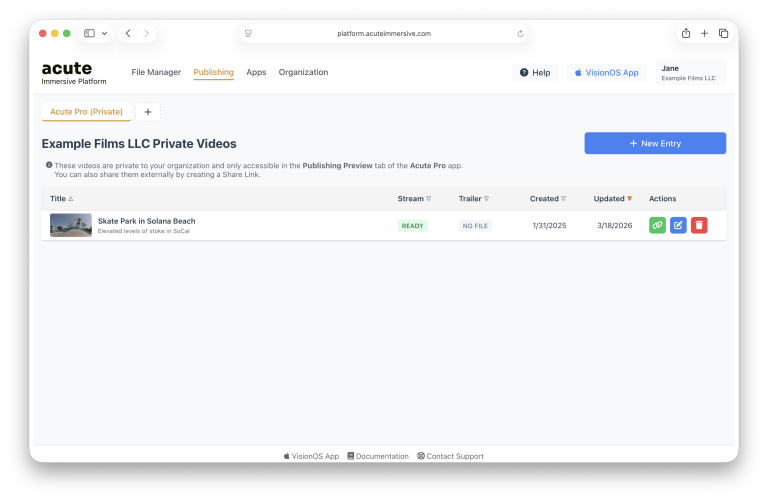
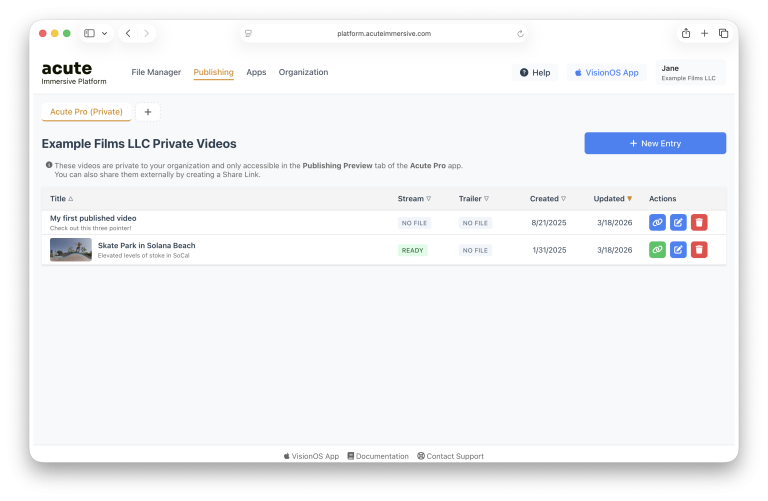
Once you hit Create Video at the bottom of the form, a video record is created and visible from the Publishing page. The video becomes visible in the Acute Pro app’s Publishing tab as well.
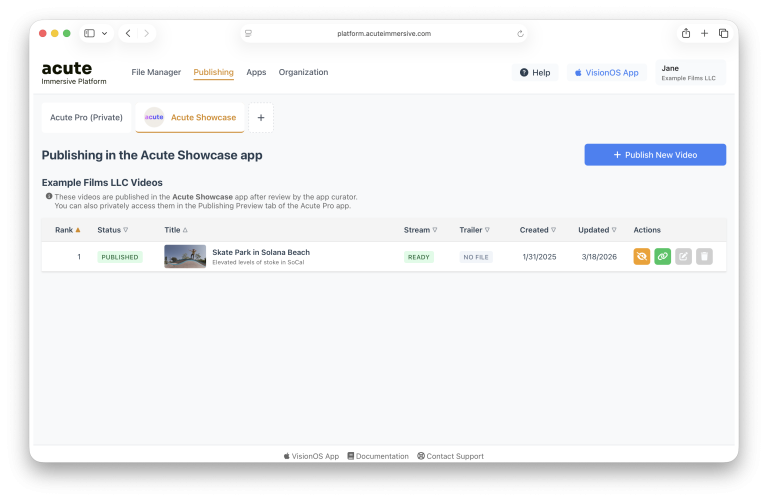
You’ll notice there is a Stream status for Video and Trailer, the two slots for video files in a video in Publishing: No File (the file has not been uploaded), Standby (the file is uploaded, but processing has not started, usually because Format has not been selected), Queued (the file has been ingested and is waiting for processing to start), Encoding (the file is being processed for streaming; this can take from 15 minutes to multiple hours depending on its size), Ready (encoding is complete and the video is available for streaming), or Failed (an error occurred while processing — we will investigate and try again).
Step 04 · Acute interface
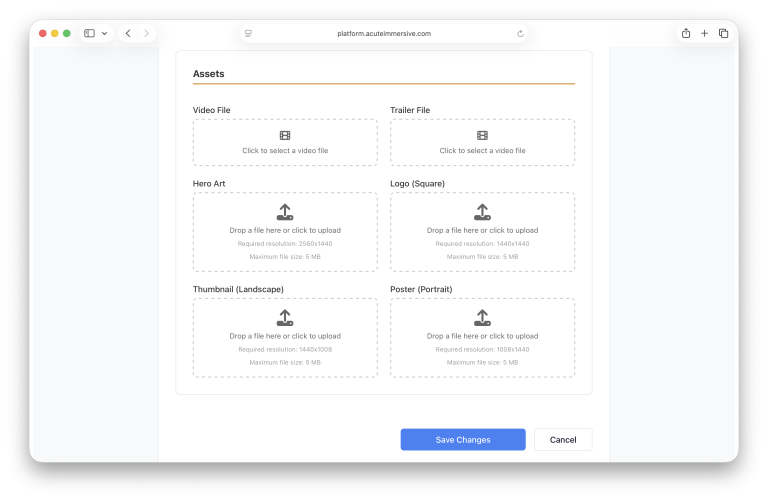
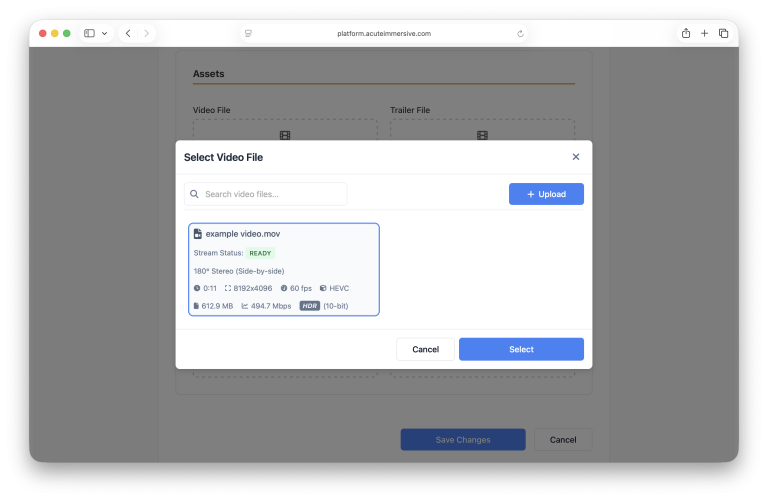
Click the blue Edit button (pen icon) under Actions to modify the video, and scroll down to the Assets section. Click the Video File field to open a popup where you can choose among the previously uploaded video files from the File Manager, then click Select to confirm. Tip: you can also create entries from video files directly in the File Manager tab by clicking the “+” button in the Actions column.
It’s a good idea to fill the metadata fields as much as possible if you intend to present the video to the public or to customers. Click the Save Changes button when you’re done.
Step 07 · Acute interface
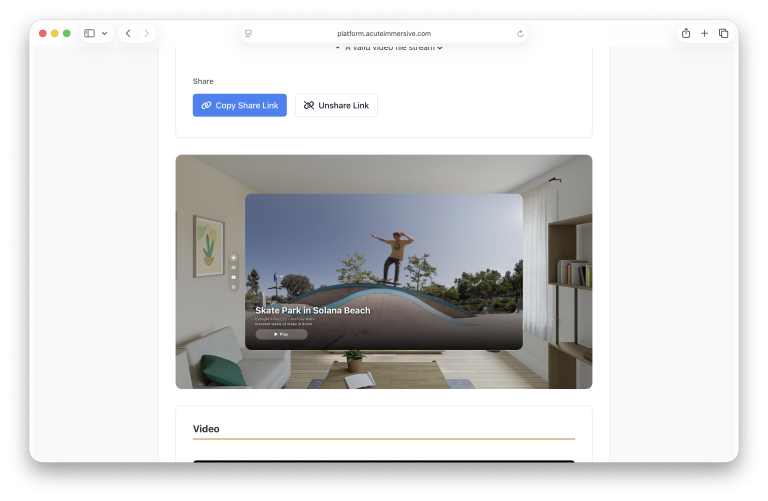
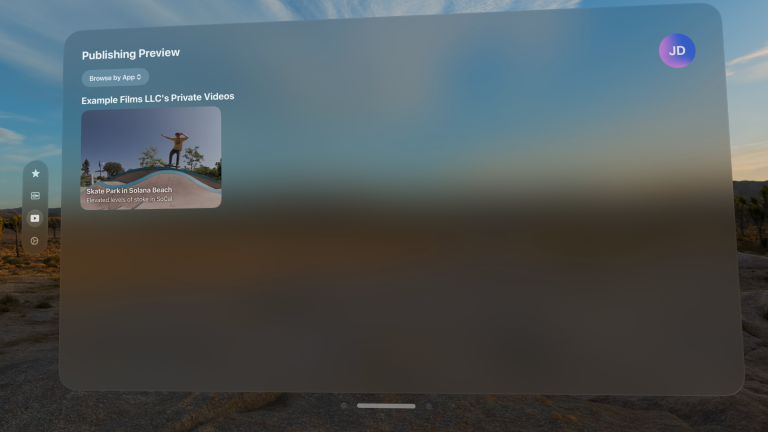
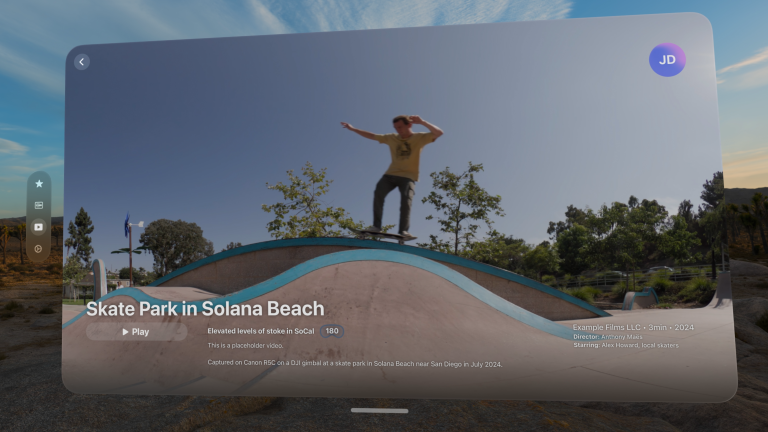
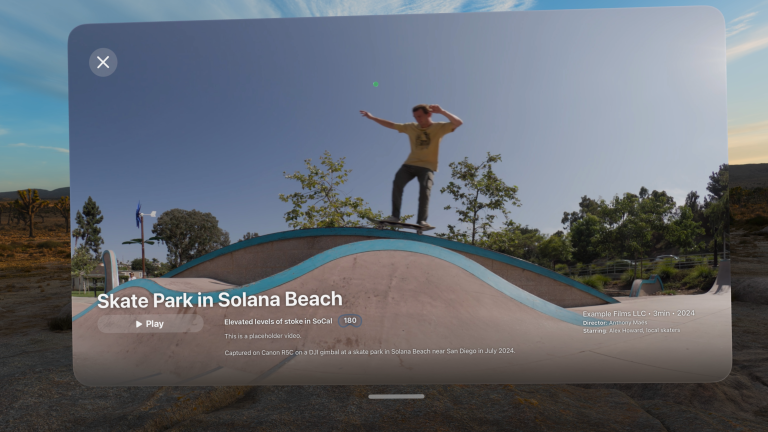
You’ll be taken to the video’s preview page, which shows a mini-simulator previewing the presentation in a Vision Pro app (as of writing, the preview may have layout differences with the actual app). In the visionOS Acute Pro app’s Publishing Preview tab, you can now see your video as it would look when available in a white-label app based on the Acute Immersive Platform.
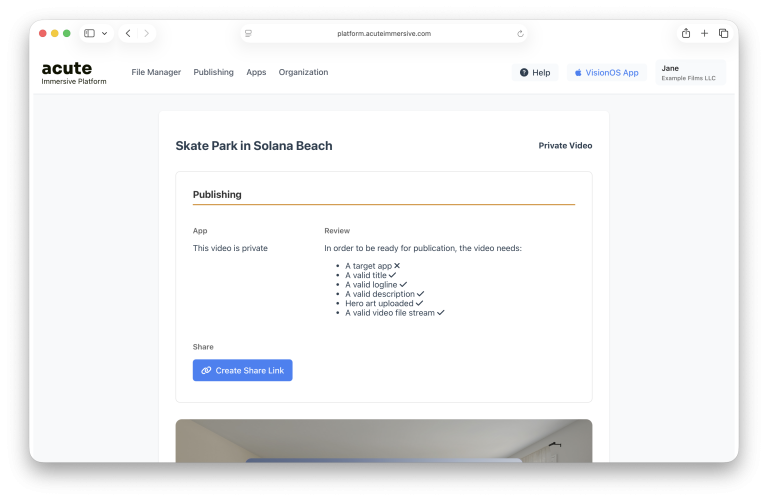
The Acute Immersive Platform can generate Share Links, which are deep links to a video you can share with people outside your organization. They don’t require an Acute user account. When opened on the Apple Vision Pro, Share Links directly open the Acute Pro app and load the corresponding video. On other devices, or if the app is not installed, they present a small web preview of the video with an App Store link for the Acute Pro app.
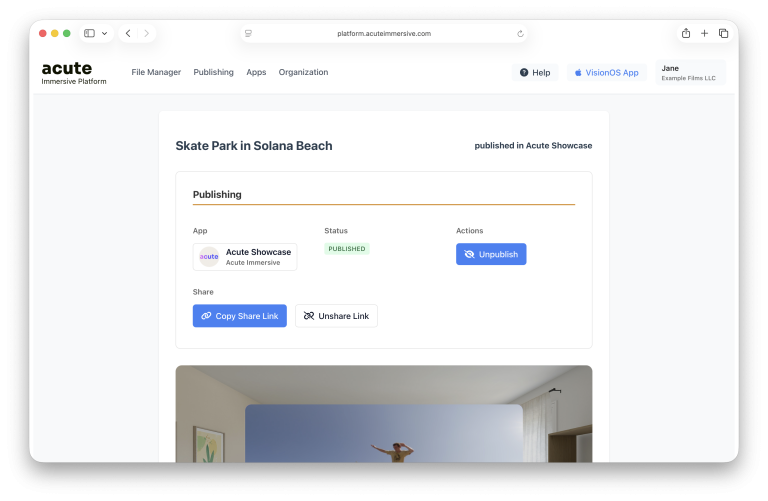
On the Publishing page, click one of the videos to open the video preview, then click the Share Video button to create a share link.
Step 01 · Acute interface
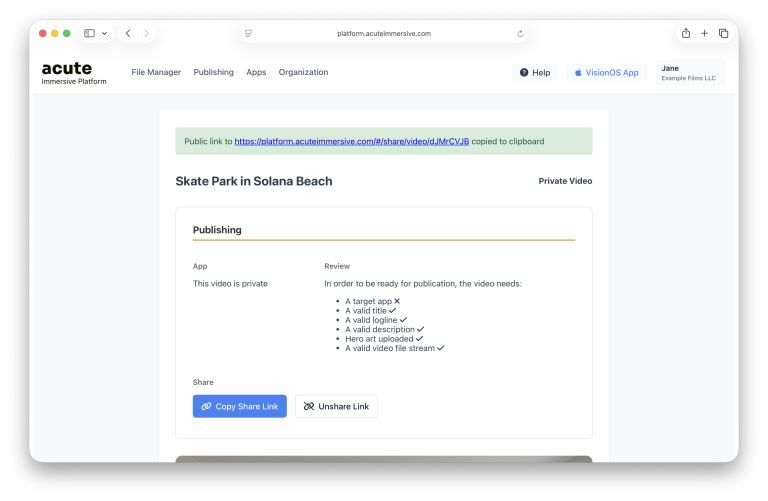
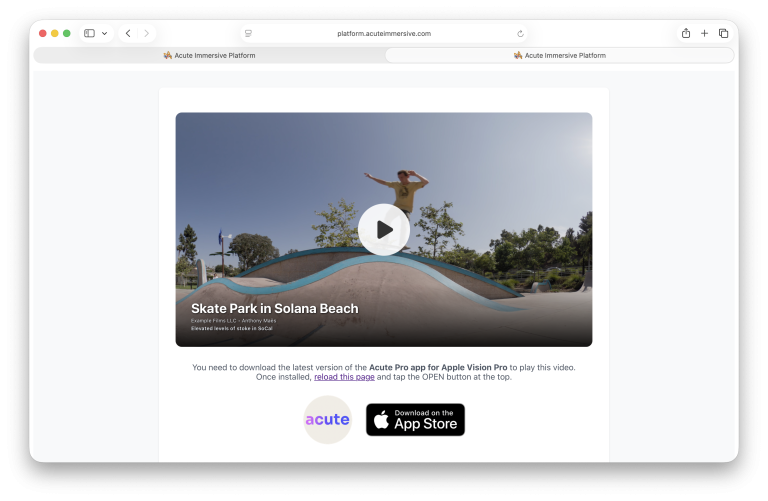
You can now share this link privately with people outside your organization. Similar to Google Docs or an unlisted YouTube video, anybody with the link can see a preview of the metadata (hero image, title, logline) in the web browser, and open the video in Acute Pro on Apple Vision Pro without a user account — the link opens the Acute Pro app directly if it’s installed. If a video file is ready to stream, a Play button is visible.
Step 02 · Acute interface
You can revoke the share link at any time with the Unshare Video button. The link becomes invalid for everyone forever; creating a new share link generates a new URL.
Step 03 · Acute interface
Tip: no account is needed to view videos through a Share Link, but it is necessary to install Acute Pro from the App Store. Once the app is installed, your recipient must refresh the page and use the OPEN button at the top of it.
Step 04 · Acute interface
11
Publish
Publish a video in an app
The Acute Immersive Platform lets you publish your videos in Vision Pro apps, without any code change or App Store update needed. Some organizations manage their own app, and some of those apps accept submissions from external organizations such as yours. For instance, anyone can publish in the Acute Pro app, which is managed by the Acute Immersive organization.
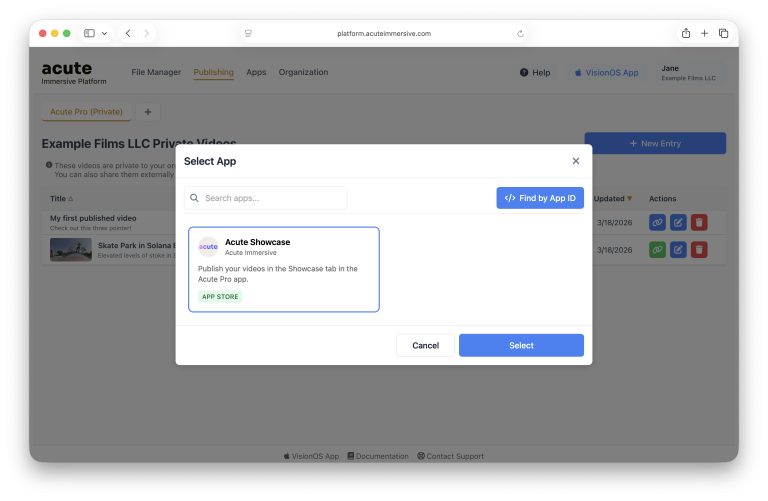
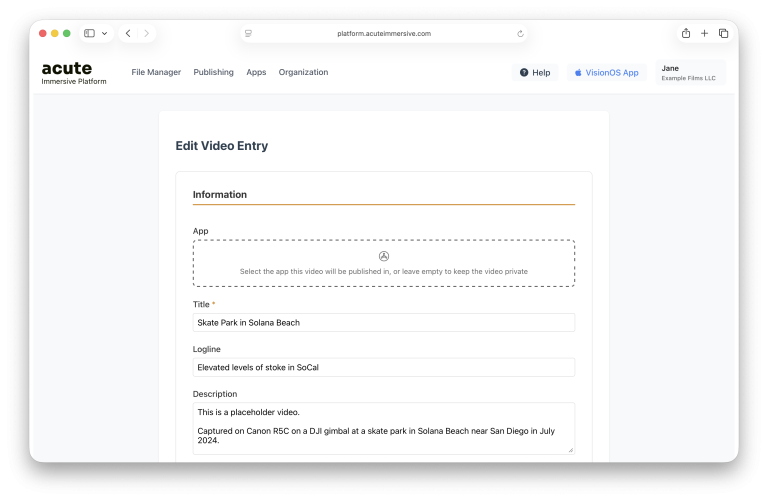
On the Publishing page, videos are in the Private tab by default. Click the “+” icon to the right of it — a pop-up appears with an app selection menu showing the apps you can publish in. Select the app you want to publish in.
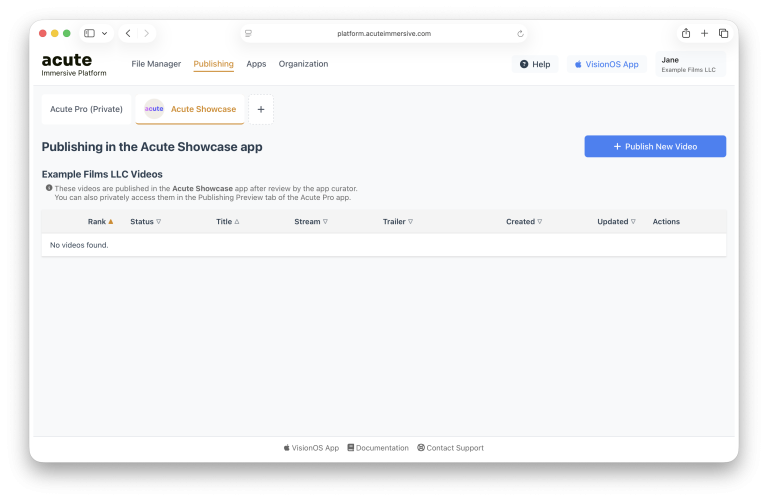
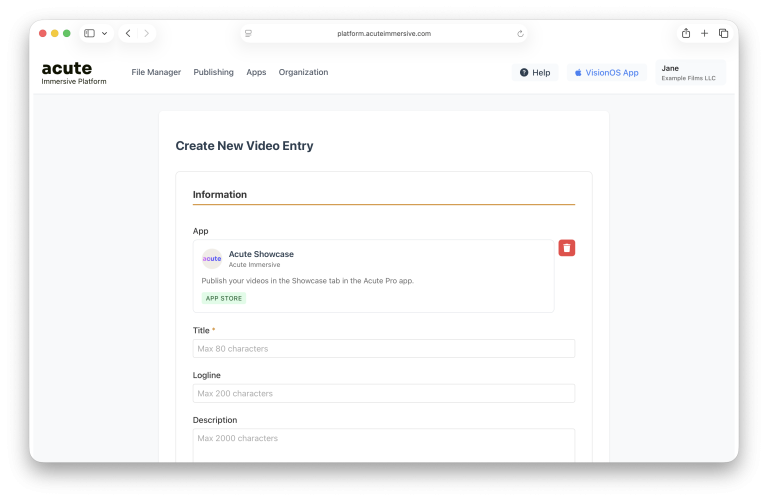
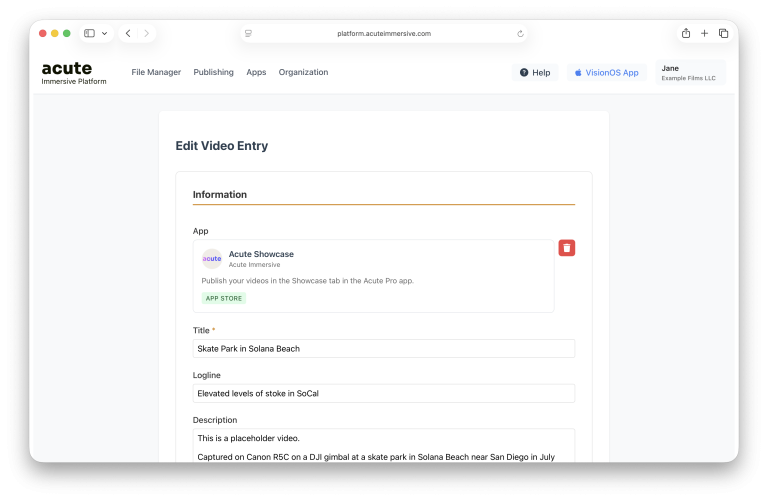
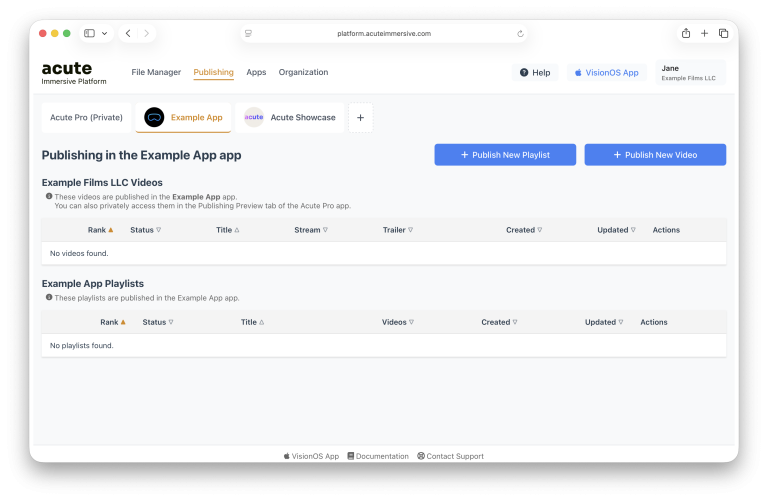
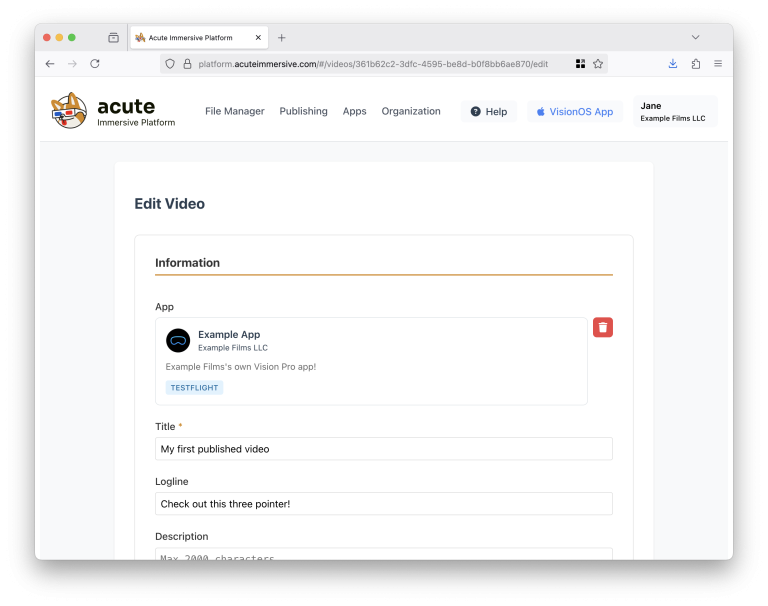
In the new tab that appears, click Publish New Video. The form is exactly the same as the one for private videos, except the app field is populated. You can use the Trash icon to detach the video from the app and make it private again, or edit an existing private video and click the App field to target it to an app. A video record can only target one app at a time — if you’re publishing in multiple apps, duplicate the video.
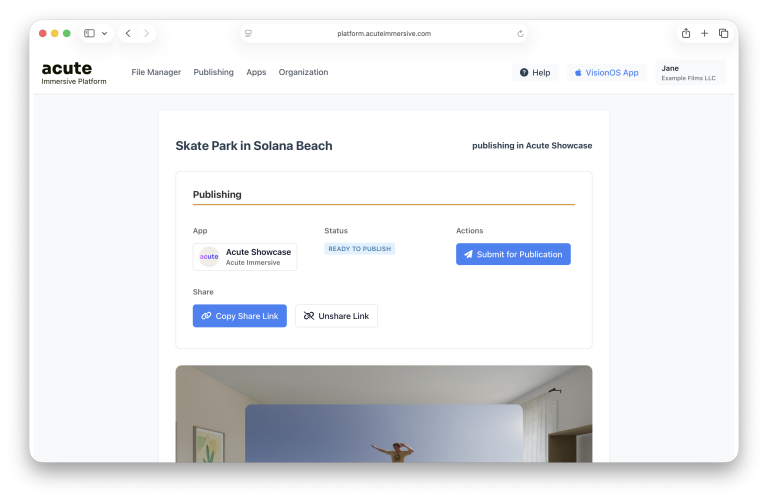
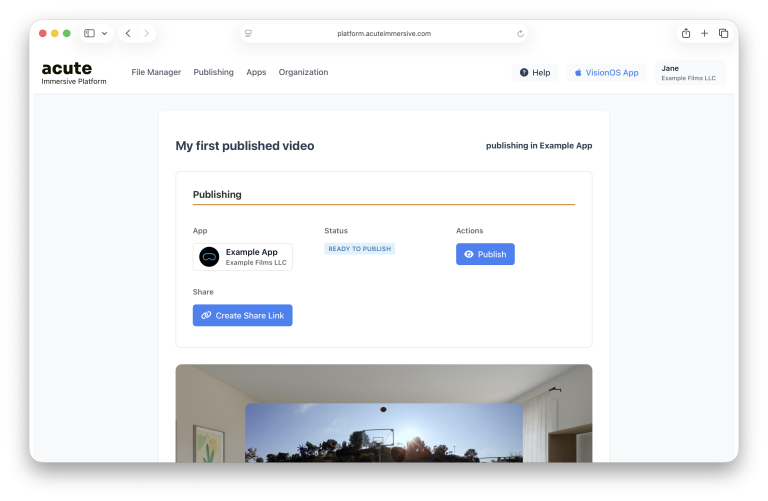
After you’ve selected an app, scroll to the bottom and hit Save Changes. The Video Details page is where you find the controls for publishing your video.
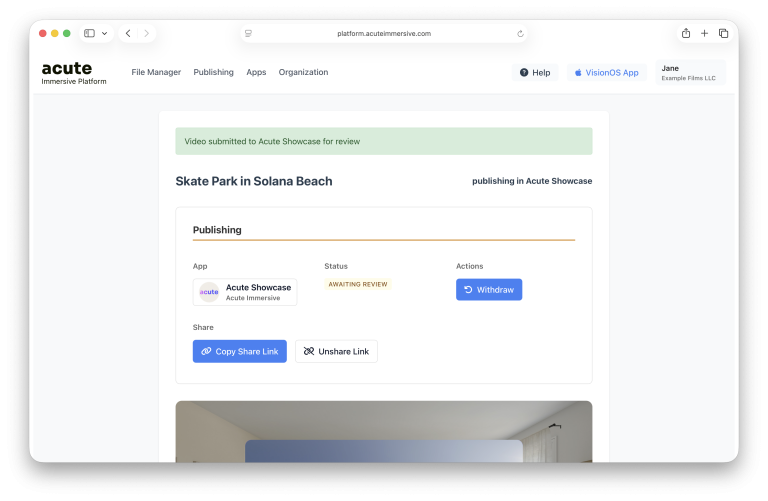
Because the Acute app belongs to another organization, the video won’t be published directly — it goes through a review process first, similar to the Apple App Store submission process. Click Submit for Publication (paper plane icon) to submit the video to the Acute app’s curators. From this point on, you can no longer modify the video until it is either rejected or unpublished, though you can withdraw your submission.
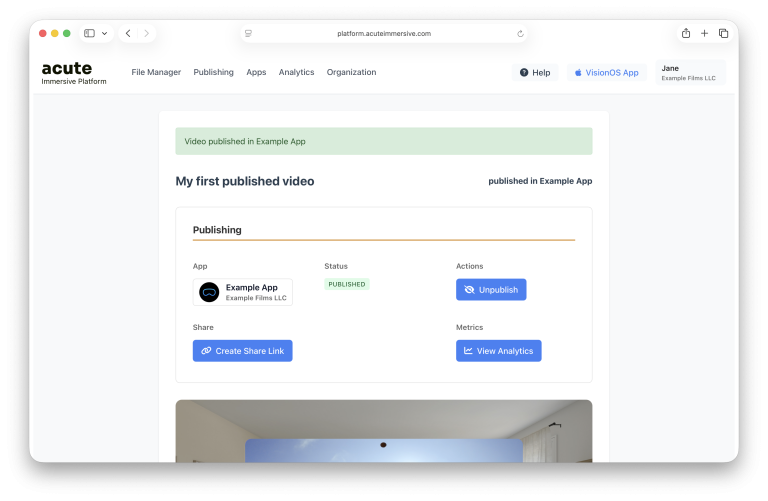
The possible statuses are: Draft (either private, or missing mandatory fields for publication), Ready To Publish (has the necessary metadata and is ready to publish, or submit to an app managed by another organization), Awaiting Review (not yet seen by the app’s curators), In Review (currently being considered by the app’s curators), Needs Revision (not accepted by the app’s curators — it may be submitted again after changes), and Published (live in the app). While published, you cannot edit the video, but both you and the app’s curators can Unpublish it at any moment with the slashed-eye button; once unpublished it can be edited again, but must go through the review flow to be published again. When publishing in your own app, the flow is simpler — you can Publish and Unpublish directly and keep editing rights while the video is published.
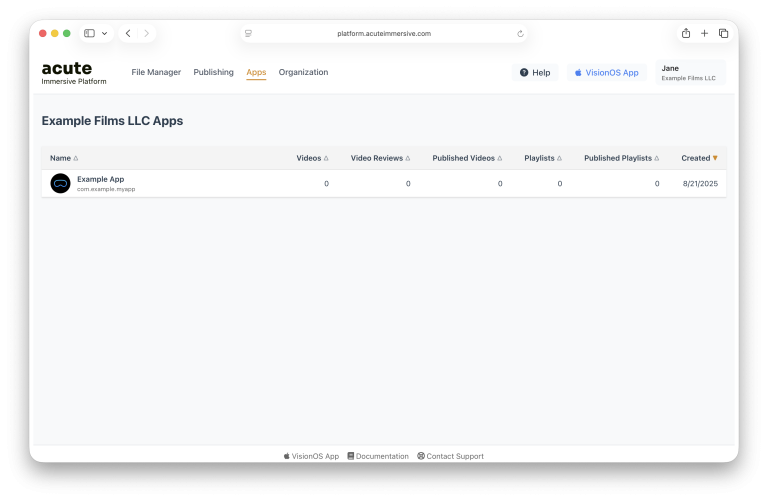
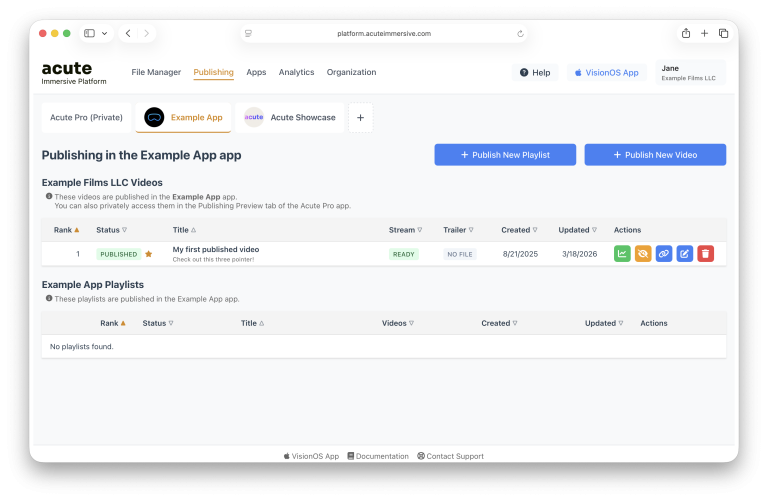
When you have your own app, it appears in the Apps page. On the Publishing page, the tab for this app is always visible, even when it contains no videos. Just like the Acute app, you can add videos with Publish New Video or by editing an existing video in your Private tab. After you create or edit the video, the last step to make it visible in your app is to click the Publish button (eye icon) — this lets you toggle the visibility of your app’s content directly, without code changes or App Store build updates.
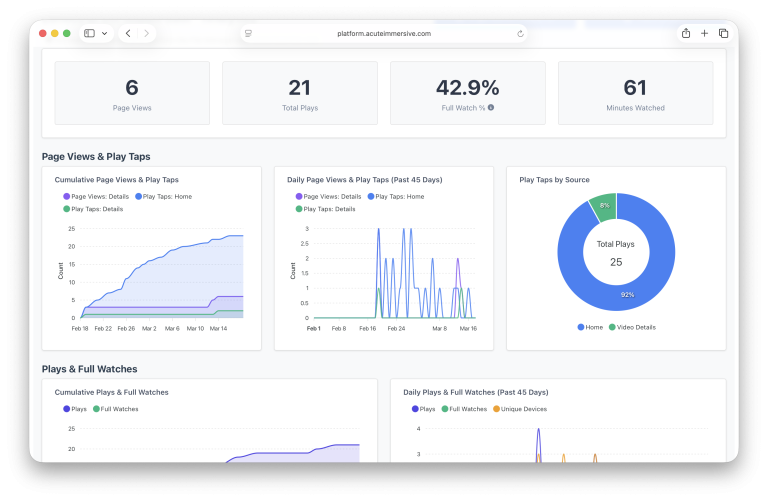
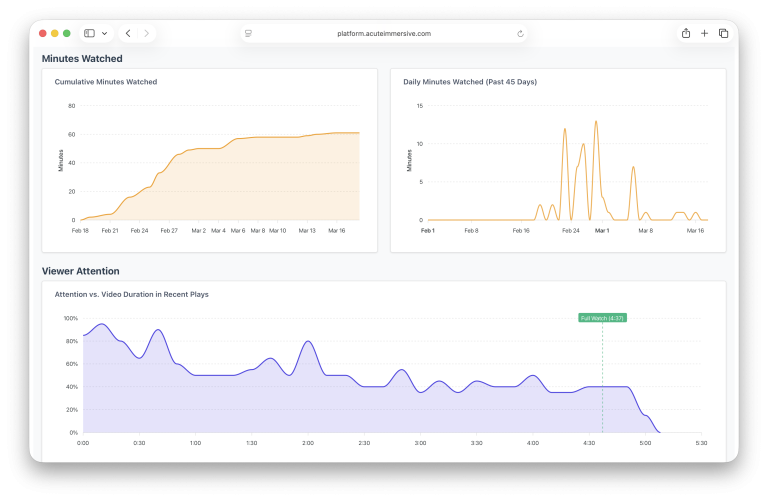
If you have your own app, all your videos come with detailed analytics — click the analytics (chart) button next to the video in the Publishing tab, or the View Analytics button in the video entry’s details page.